How to Make Homemade Coconut Milk (With Shredded Coconut)
Print RecipeLearn how simple it is to make Homemade Coconut Milk with shredded coconut! This nutritious dairy-free milk is perfect for adding to tea, coffee, hot chocolate and smoothies! Plus, it doesn't require overnight soaking, making it quick and easy.
Pin Recipe
Watch Video
Equipment
- Blender
- Plant Milk Bag
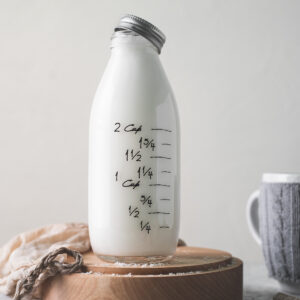
- Large Liquid Measuring Cup or Bowl
- Airtight Container if Storing
Ingredients
- 1 cup Unsweetened Shredded Coconut (Unsweetened Coconut Flakes will also work)
- 2 cups Filtered Water
Instructions
- First, boil or warm the water. Then, place the unsweetened shredded coconut in a bowl or large liquid measuring cup. Pour the warm water over top and let it soak for 5 - 10 minutes.
- After the coconut has soaked and the water has cooled, pour it all into your blender jug and blend for 1 - 3 minutes (depending on your blender). It should become nice and frothy.
- Drape a plant milk bag over a large liquid measuring cup or a bowl. Then, pour in the blended coconut and water. Hold the top of the bag closed as you squeeze the milk out of the bottom.
- Once you have squeezed all the milk out, it's ready to use! Use it right away for soup, drinks or your favourite creamy coconut dishes. If you won't be using it right away, seal it in a clean jar and keep it in the fridge for up to 3 days. You can discard the coconut pulp (what's left in the bag) in the compost, or you can add it to healthy homemade desserts.
Notes
Pure coconut water can be used instead of regular filtered water. Using coconut water will also make it closer to full-fat canned milk.
Adjust the thickness by adjusting the water-to-coconut ratio. If you want thicker milk, add more shredded coconut and less water. If you want thinner milk, add more water and less shredded coconut.
*If you won't be using your homemade coconut milk right away, keep it well-sealed in the fridge to avoid spoilage and contamination. It can last up to 3 days if refrigerated.
Watch the Video!
Nutrition
Serving: 0.5cups | Calories: 153kcal | Carbohydrates: 5g | Protein: 2g | Fat: 15g | Saturated Fat: 13g | Polyunsaturated Fat: 0.2g | Monounsaturated Fat: 1g | Sodium: 15mg | Potassium: 126mg | Fiber: 4g | Sugar: 2g | Vitamin C: 0.3mg | Calcium: 10mg | Iron: 1mg
HAVE YOU TRIED THIS RECIPE?I’d love to know what you think! Leave a rating and comment to share how it turned out.