
Learn how to make Chive Blossom Infused Vinegar with this step-by-step guide! It's a delicious way to reap the health-promoting properties of chive blossoms while adding a splash of flavour to dressings, dips, marinades, sauces and more.
*Nutrition Disclaimer: The information provided on this site is designed for educational purposes only. You should not rely on this information as a substitute for, nor does it replace professional medical advice, diagnosis, or treatment. Please read mydisclaimers page for more information.
Chive Blossom Vinegar makes a fun springtime project for the whole family! With its gorgeous pink hue, it also makes a lovely DIY edible gift.
Chive blossoms have a similar flavour to chive shoots. So, this infused vinegar takes on a savoury taste with hints of garlic and onion.
It makes a delicious addition to any savoury dish or recipe that calls for vinegar.
What Are Chive Blossoms?
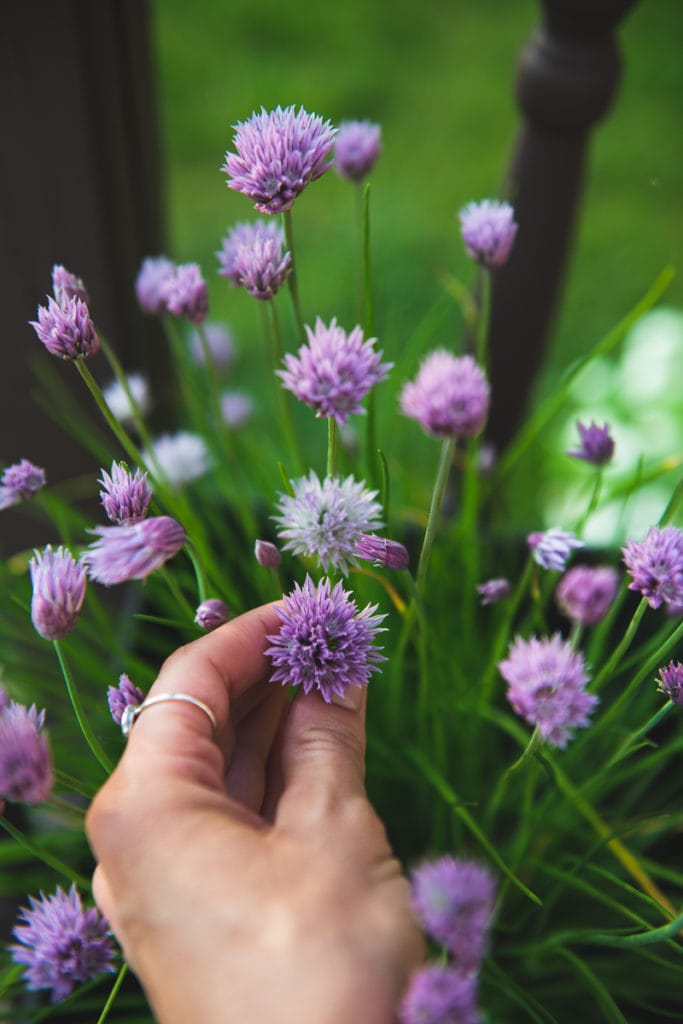
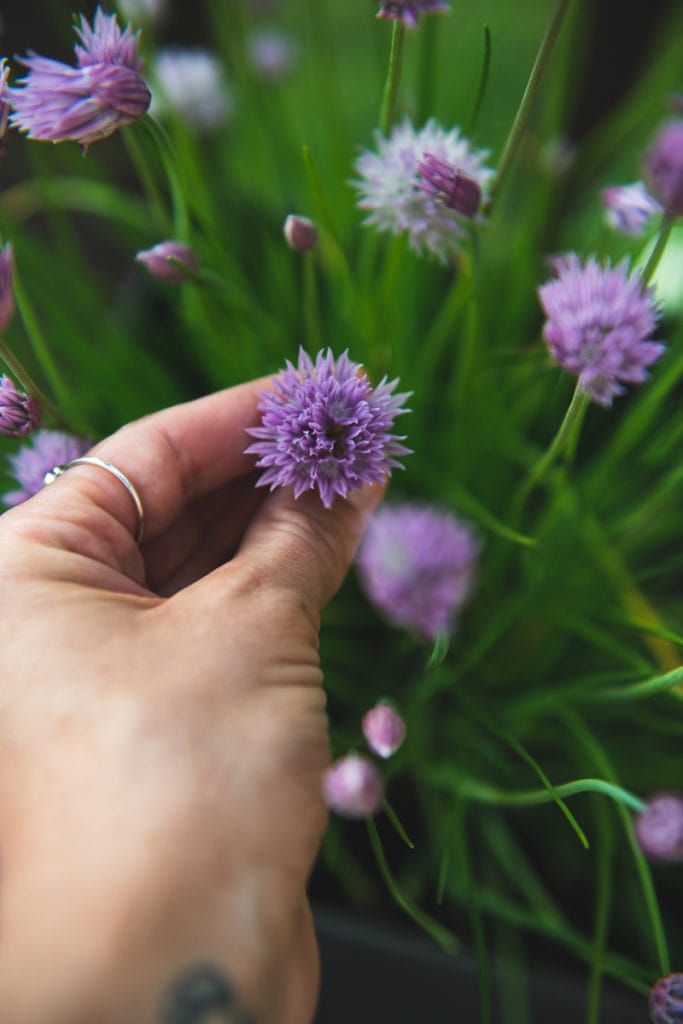
Chive blossoms are just as they sound. They are the flowers that bloom from the chive shoots.
They are usually a beautiful lavender colour and have a spiked, rounded form. However, they are soft to the touch. So, no need to worry about picking them with bare hands.
Chives are a part of the allium family. So, they are related to onions and garlic. They are similar to green onions, except chives have skinnier, grass-like shoots and a milder flavour.
Is Chive Blossom Vinegar Healthy?
Chive Blossom Vinegar isn't just a flavourful and eye-catching herbal infusion. It's also full of health-promoting nutrients, especially if you use apple cider vinegar.
Health Benefits
Anti-aging nutrients. Chive blossoms are rich in antioxidants that can help to prevent cell and skin damage, including flavonoids, carotenes, chlorophyll and vitamin C.
Digestive stimulant. Chive blossoms have been used for centuries to aid digestion and support the liver. Using apple cider vinegar can provide even more digestive and gut-loving goodness.
Heart healthy. Chive blossoms are rich in properties that can lower blood pressure, improve circulation and reduce inflammation.
Vitamin and mineral-rich. Chive blossoms are a great source of vitamins and minerals, including vitamins K, C, A, potassium, iron and calcium.
Seasonal Benefits
Spring and early summer is when chive blossoms are in bloom. This is the best time to make infused vinegar with fresh-picked blossoms.
Autumn and winter are great times to reap the warming effect chive blossoms offer. Since they only bloom for a short time in the spring, making infused vinegar is a great way to extend your harvest into the cooler seasons.
How to Infuse Chive Blossoms in Vinegar
Making infused vinegar with chive blossoms is simple. It only requires 2 ingredients and a few minutes of hands-on time.
What You Will Need
Equipment
- Sterilized jar with a lid for infusing the vinegar.
- Unbleached parchment to prevent erosion of the metal lid.
- Small fine mesh strainer to strain out the chive blossoms.
Ingredients
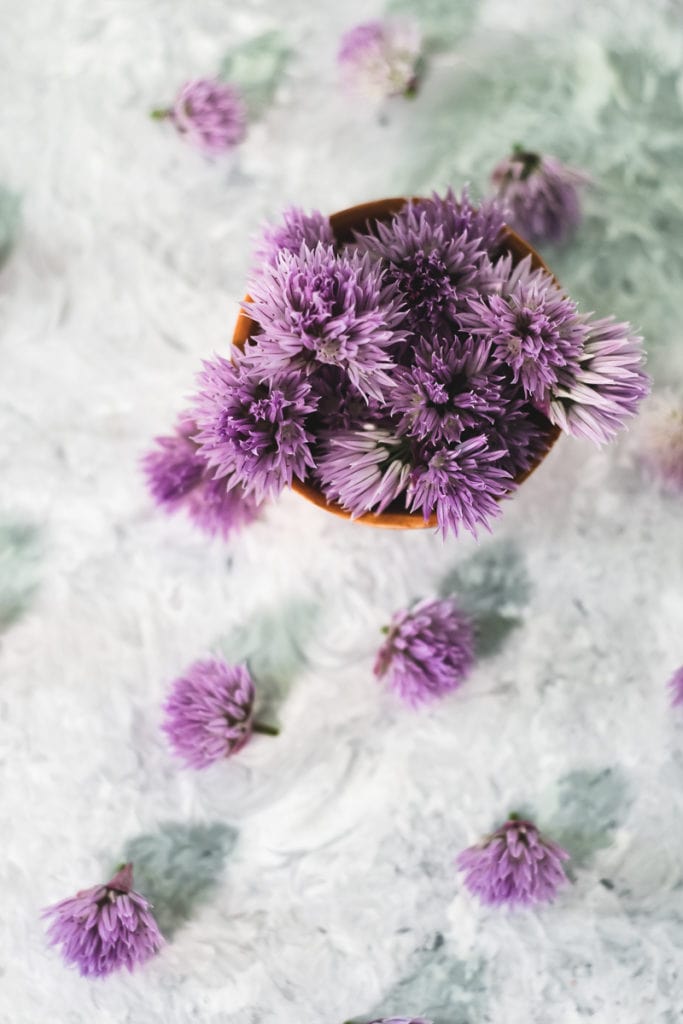
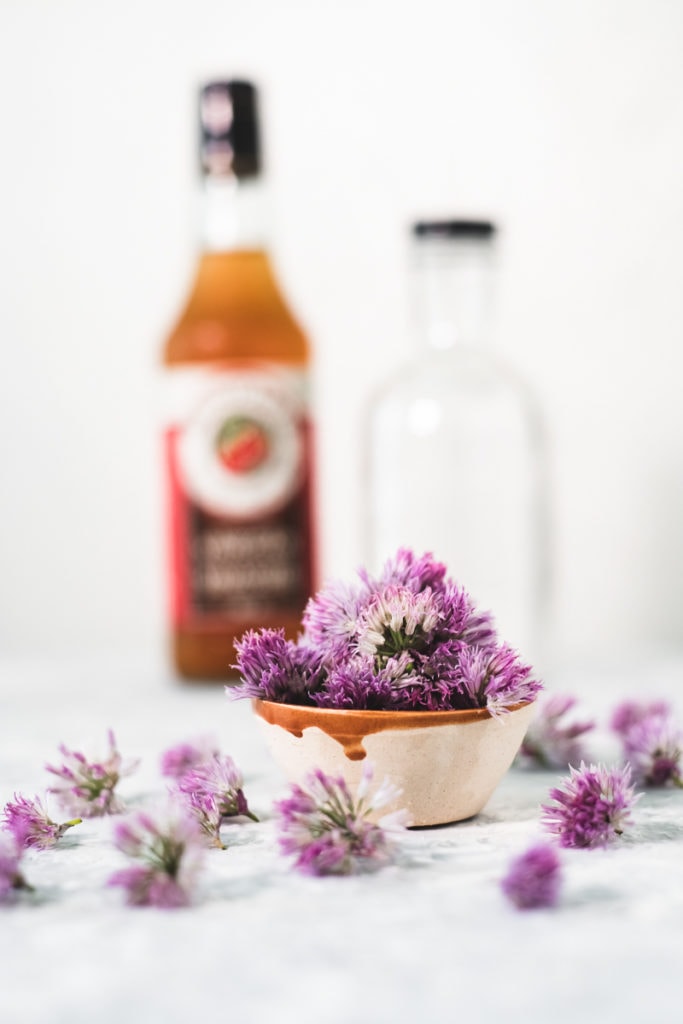
- Dried chive blossoms provide the flavour and pink hue.
- White wine vinegar creates the most vibrant pink colour. You can also use apple cider vinegar for a more gut-loving version.
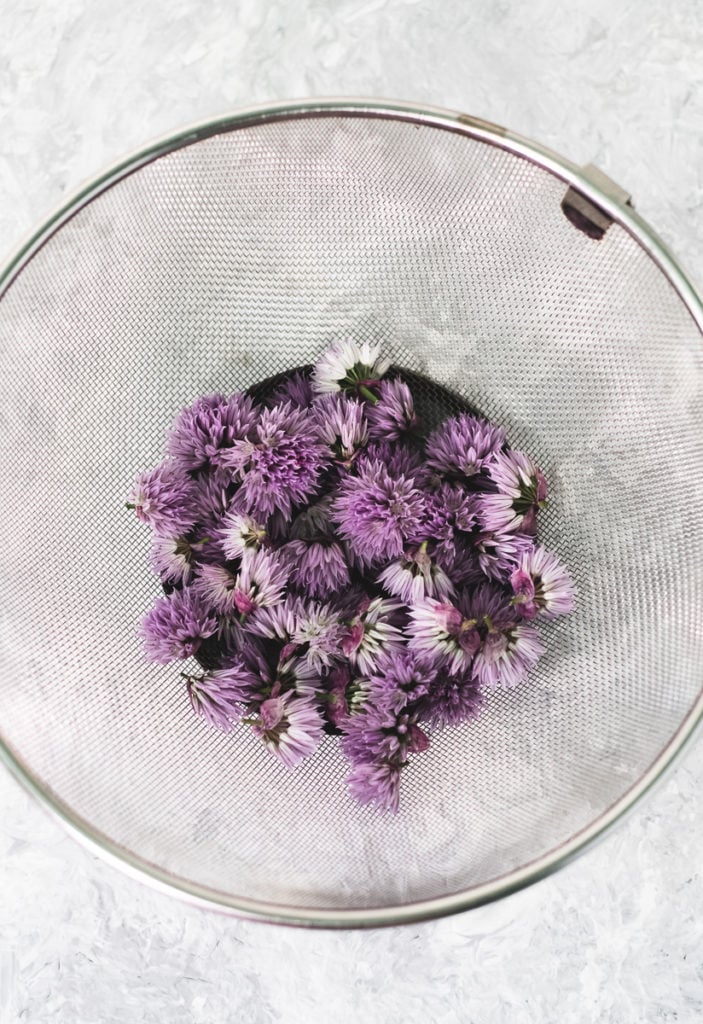
How to Pick & Dry Chive Blossoms
If you're picking your chive blossoms fresh, you only need a handful to make one jar of infused vinegar (about ½ -1 cup per 500ml of vinegar).
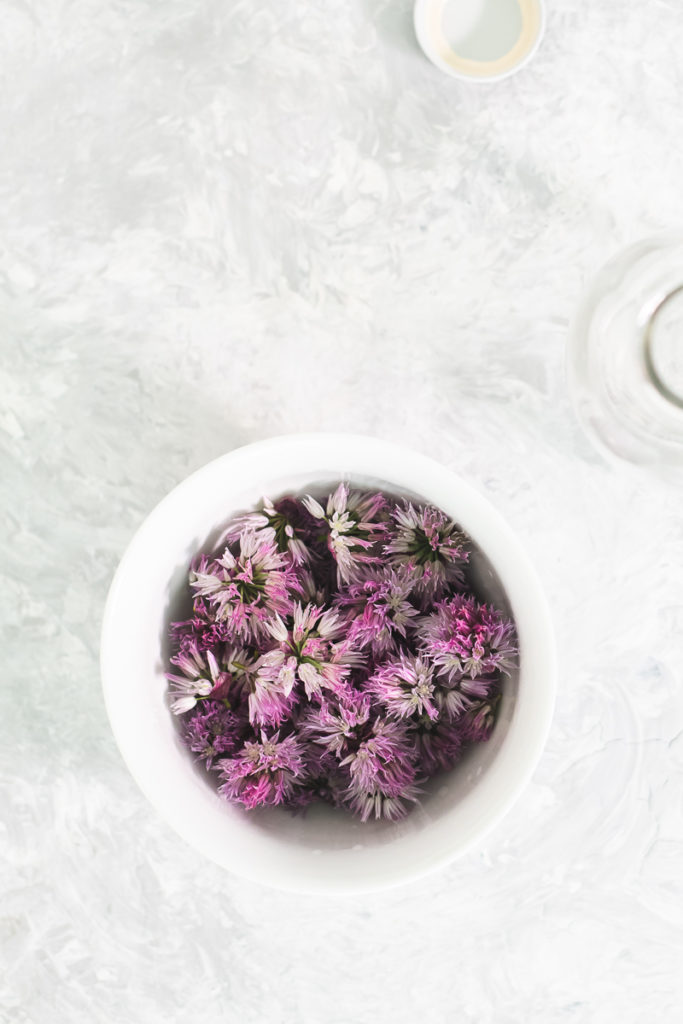
Once you've gathered enough blossoms, place them in a colander and gently rinse them under cool water.
After the blossoms have been rinsed, spread them out on a flat surface (or a drying wrack) and leave them in the sun for an hour or two.
You can also dry them inside in a well-ventilated area. Drying them inside will take 24 - 48 hours.
Once they are dried they will keep until you are ready to make your infused vinegar. You can keep them in a sealed jar to preserve their freshness.
However, the sooner you use them, the more potent their nutrients.
If you do not have chives to pick, you can buy pre-dried blossoms from local or online herb shops.
Step 1: Sterilize Jar
First, you'll need to make sure your jar is sterilized. You can do this by placing it in a pot of boiling water for about five minutes.
Use a secure jar lifter to remove it from the boiling water and let the jar cool before handling.
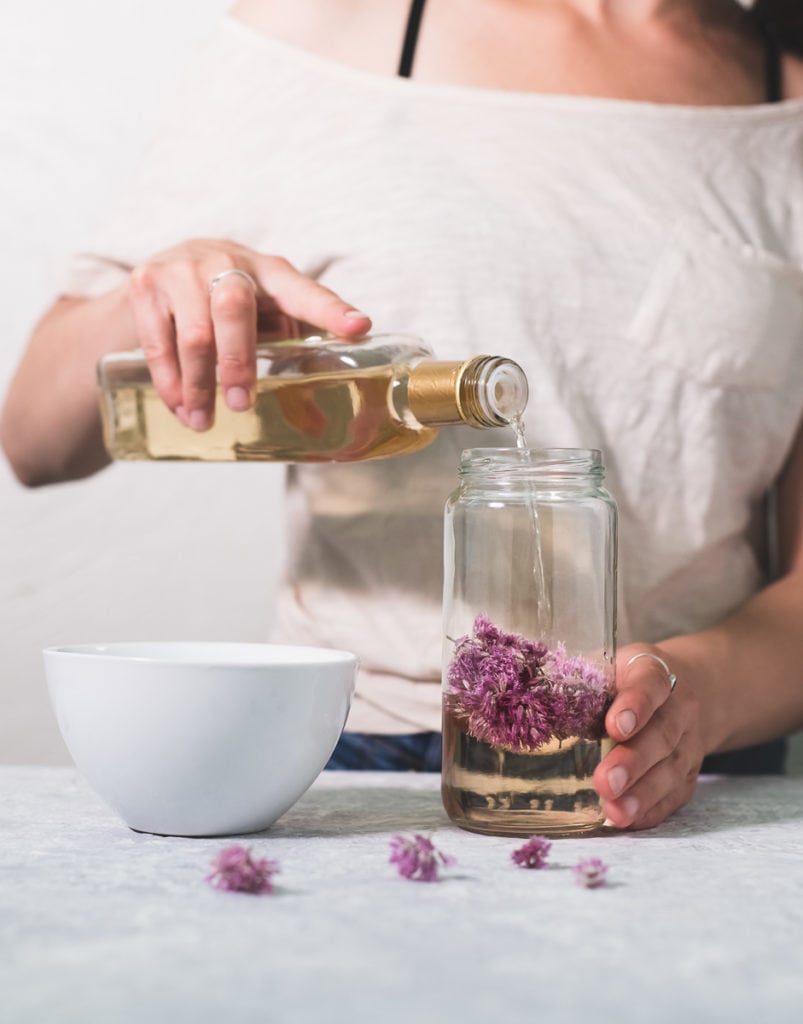
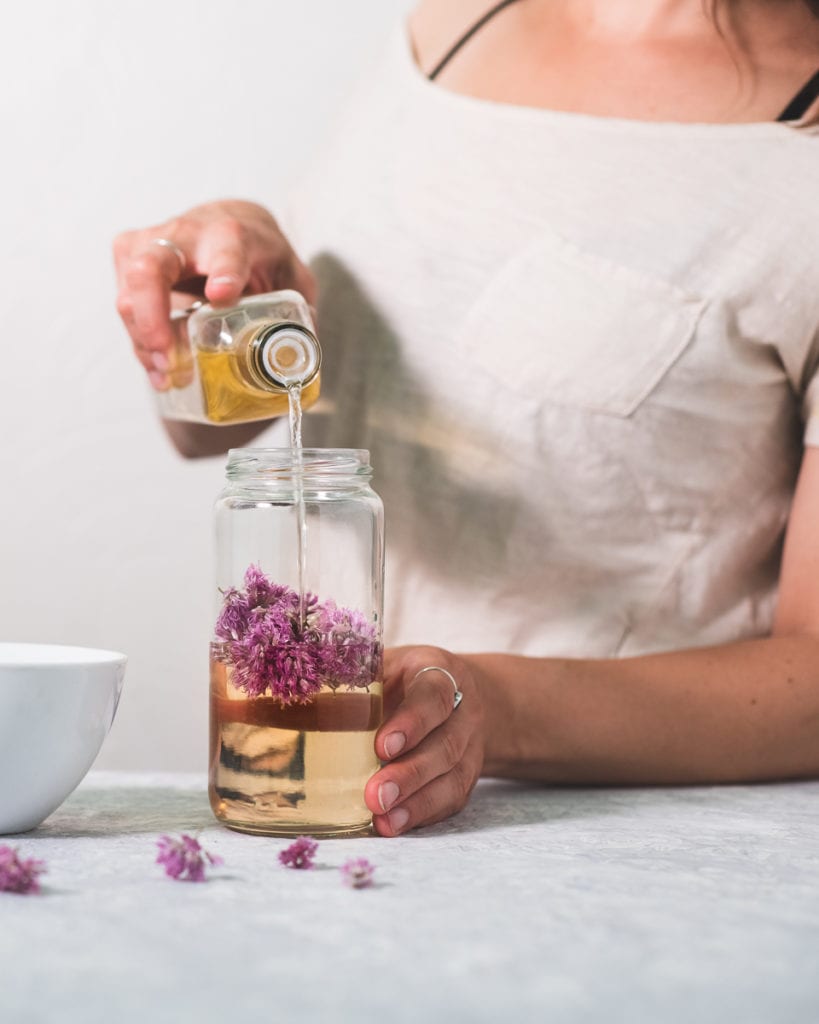
Step 2: Add to Jar
Next, add the dried chive blossoms to your sterilized jar.
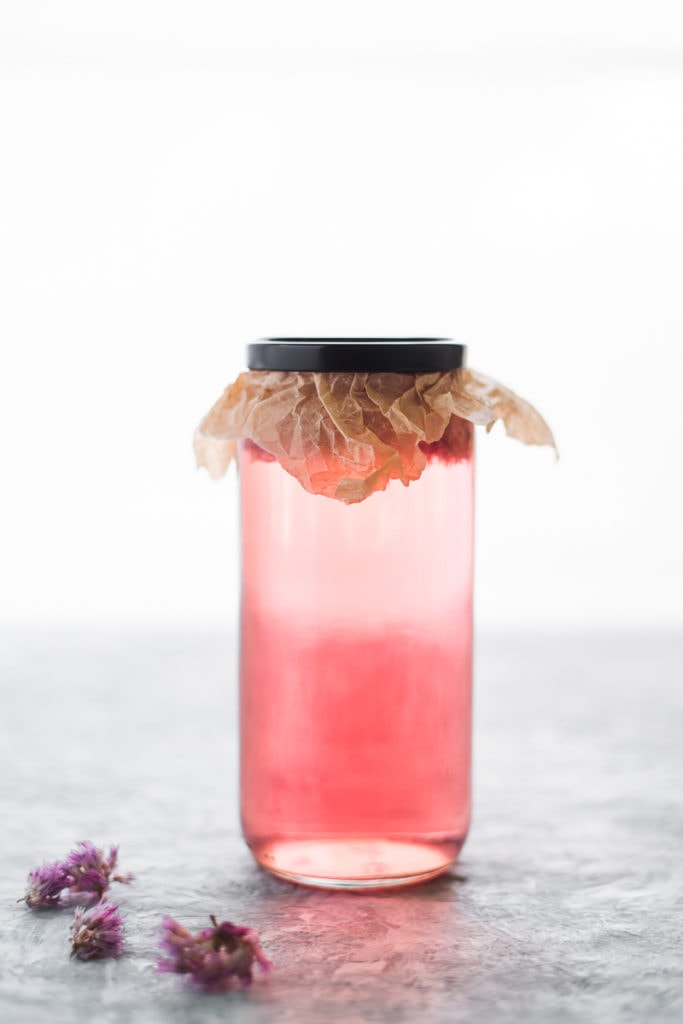
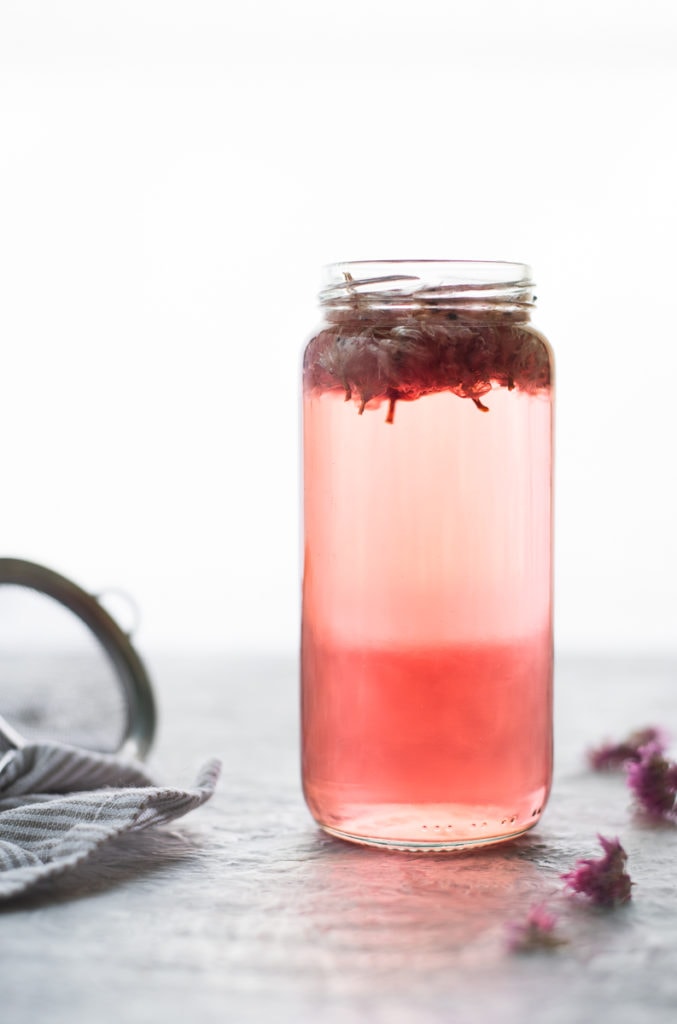
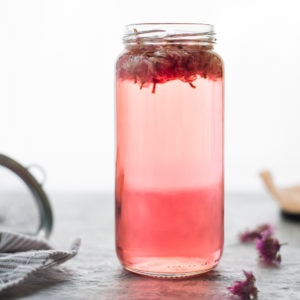
Then, pour in the vinegar, leaving about half an inch from the rim of the jar. It is normal for the blossoms to float to the top.
Use a non-metal lid to seal the jar. You can also insert a thin cloth or a piece of unbleached parchment paper underneath the lid.
This prevents the vinegar from reacting with and eroding the metal as it steeps.

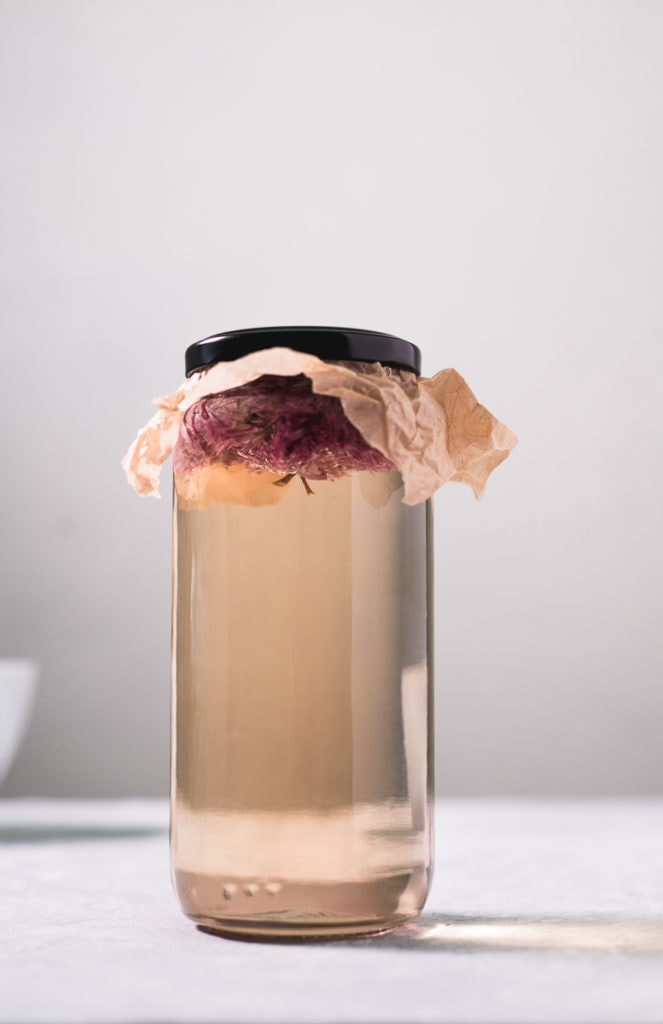
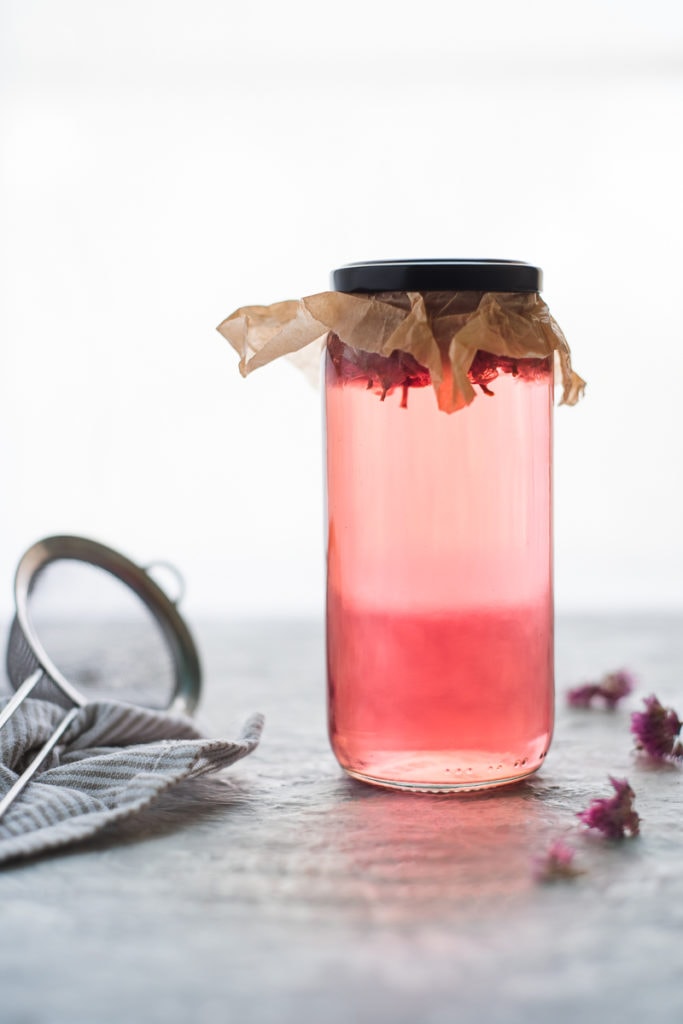
Step 3: Steep
Place the jar in a cool, dark place where it will be undisturbed and allow the chives to steep in the vinegar for up to 2 weeks.
You can use it after 3 - 4 days. However, it will be much more flavourful with a more vibrant colour if you let it infuse for about 14 days.
Step 4: Strain
Place a fine mesh strainer or sieve over a wide-mouth jar, liquid measuring cup or bowl and pour the vinegar through, straining out the blossoms.
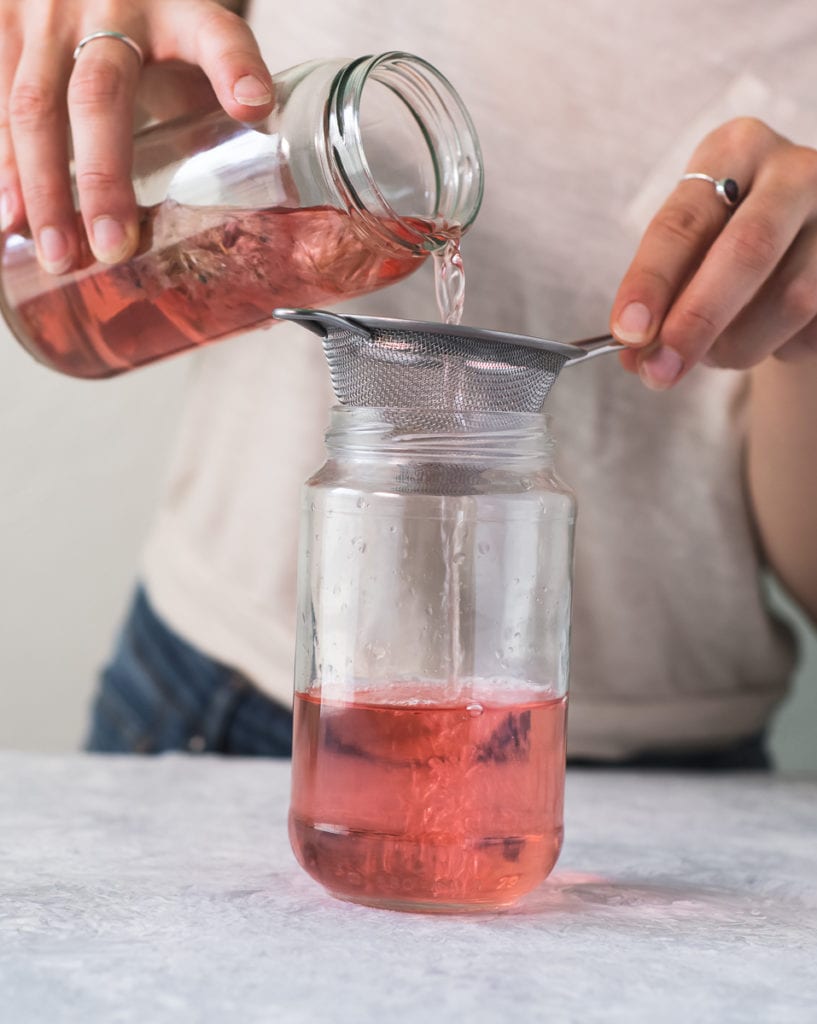
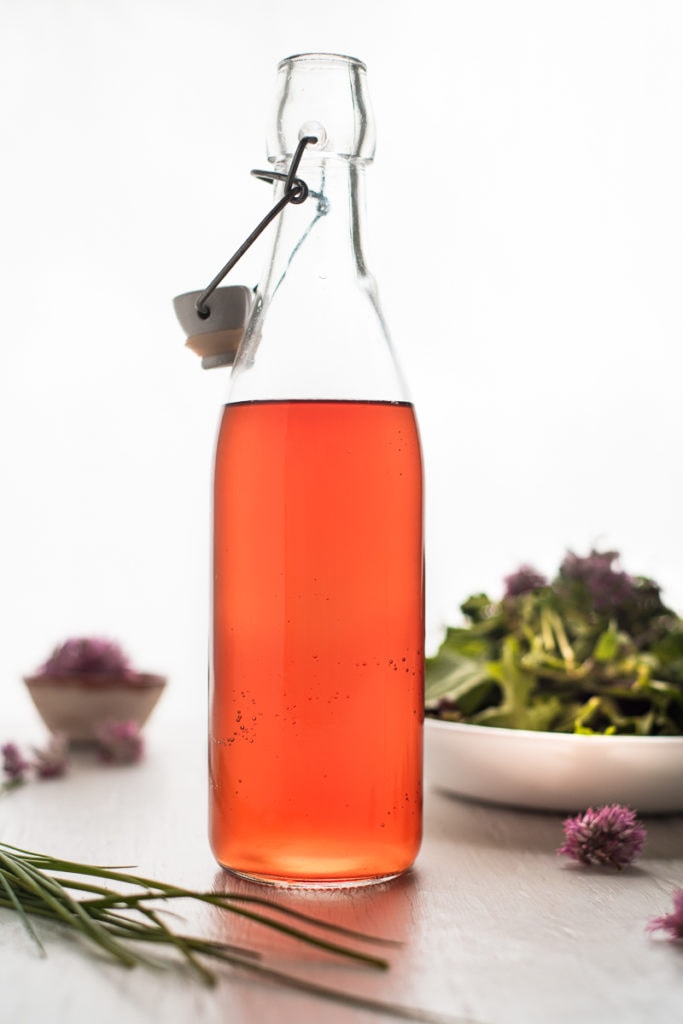
You can transfer the infused vinegar into a glass dressing bottle or jar. Again, it's best not to use a metal lid as it can react with the acidity.
I like using an old-fashioned pop-top bottle with a ceramic lid. However, you can also use a cork or plastic lid.
Substitutions & Variations
Apple cider vinegar offers more nutritional value and is better for digestion and gut health. However, the colour stays more amber than pink.
Rice vinegar is a great substitute for white wine vinegar. It is clear in colour, so it takes on the same vibrant pink hue as white wine vinegar.
More or less blossoms can be used to make a stronger or milder flavoured vinegar.
How Long Does Chive Blossom Vinegar Last?
Vinegar is self-preserving, giving it quite a long shelf life. If sealed and stored correctly, Chive Blossom Infused Vinegar can last up to 3 - 5 months in a cool, dark place.
When stored in the refrigerator, it can last for 6 - 8 months.
Infused vinegars usually start to lose their colour and take on a brown hue when they are past their prime. However, if you are using apple cider vinegar, it stays more of an amber colour rather than taking on a pure pink hue.
Recipe Highlights
Only 2 ingredients required. You only need chives and vinegar for this simple infusion.
Friendly for most diets. Since this recipe only requires vinegar and chive blossoms, it's naturally dairy-free, gluten-free and nut-free, making it suitable for a variety of dietary needs.
Antioxidant-Rich. Thanks to the vibrant purple colour, chive blossoms are a great source of antioxidants.
Promotes healthy digestion. Chives and cooking vinegars are great for stimulating digestion. Apple cider vinegar offers even more gut-loving nutrients.
Makes a great edible gift. Since this infused vinegar takes on a beautiful pink hue, it makes an impressive and elegant yet simple DIY gift.
More Herbal Recipes
Infused Chive Blossom Vinegar
Print RecipeEquipment
- 16 oz Jar 6 oz Jar Sterilized
- Non-Metal Lid See Notes
- Small Sieve Fine Mesh Strainer
Ingredients
- 1 cup Chive Blossoms (Exact measurements aren't required)
- 500 ml White Wine Vinegar (or Apple Cider Vinegar - See Notes)
Instructions
- First, you'll need to make sure your jar is sterilized. You can do this by placing it in a pot of boiling water for about five minutes. Use a secure jar lifter to remove from the boiling water and let the jar cool before handling.
- Next, add the dried chive blossoms to your sterilized jar. Then, pour in the vinegar, leaving about half an inch from the rim of the jar. It is normal for the blossoms to float to the top.Use a non-metal lid to seal the jar. You can also seal a cloth overtop with an elastic band or insert a piece of unbleached parchment paper in between a metal lid. This prevents the vinegar from reacting with and eroding the metal as it steeps.
- Place the jar in a cool, dark place where it will be undisturbed and allow the chives to steep in the vinegar for up to 2 weeks. You can use it after 3 - 4 days. However, it will be much more flavourful with a more vibrant colour if you let it infuse for about fourteen days.
- Place a fine mesh strainer or sieve over a wide-mouth jar, liquid measuring cup or bowl and pour the vinegar through, straining out the blossoms.You can transfer the infused vinegar into a glass dressing bottle or jar. Again, it's best not to use a metal lid as it can react with the acidity. I like using an old-fashioned pop-top bottle with a ceramic lid. However, you can also use a cork or plastic lid.Vinegar is self-preserving, giving it quite a long shelf life. If sealed and stored correctly, Chive Blossom Infused Vinegar can last up to 3 - 5 months in a cool, dark place. When stored in the refrigerator, it can last for 6 - 8 months.
Luceth says
I loved the recipe
Michelle McCowan says
I'm so glad to hear you loved the recipe! Thanks so much for the rating and comment 🙂