The contents of this article are human-created.
This post may contain affiliate links. Please see my full disclosure for details.
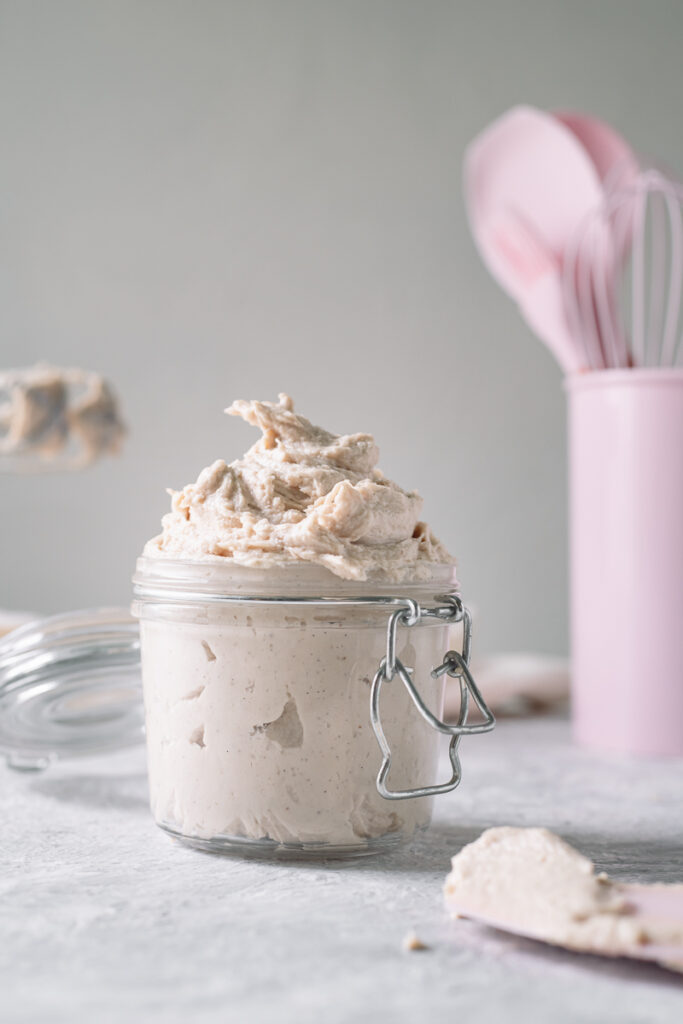
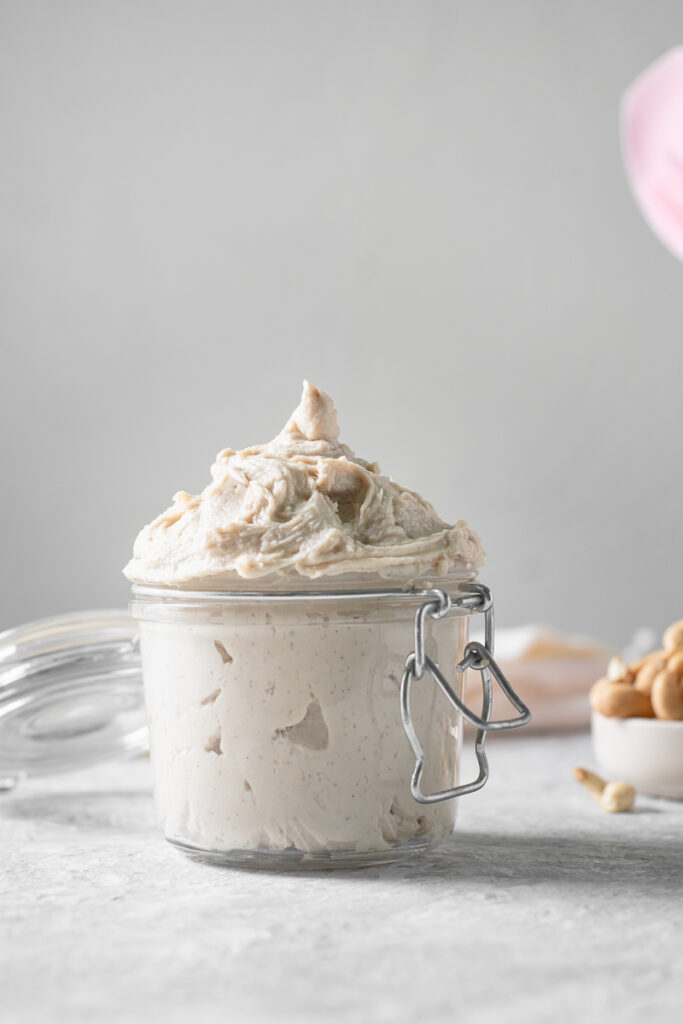
This delicious Maple Vanilla Cashew Whipped Cream contains no dairy or refined sugars! Made with just four whole food ingredients, it's incredibly simple to make.
*Nutrition Disclaimer: The health, fitness and nutritional information provided on this site is designed for educational purposes only. You should not rely on this information as a substitute for, nor does it replace professional medical advice, diagnosis, or treatment. Please read our disclaimers page for more information.
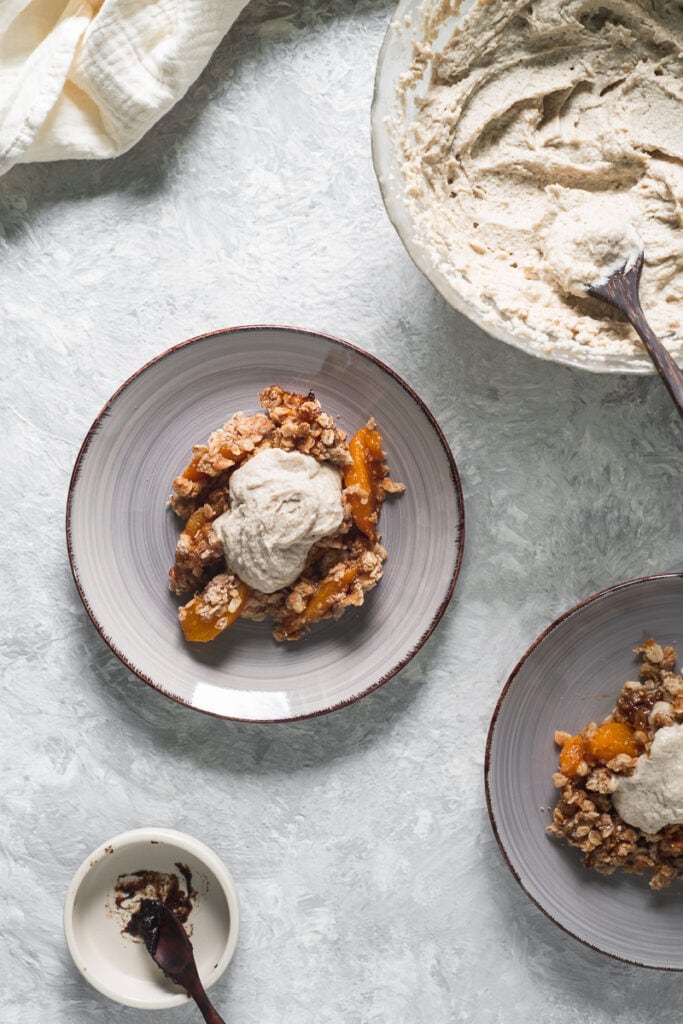
Some desserts are just better topped with whipped cream. Thankfully, this whipped topping is a delicious, fuss-free version that still hits the spot.
Since it's thicker and not quite as fluffy as traditional Whipped Cream, it also works great as a Whipped Cream Frosting!
Plus, it's full of rich and decadent flavour with the combination of pure maple syrup and vanilla bean paste.
Is Dairy-Free Cashew Whipped Cream Healthy?
This dairy-free Cashew Whipped Cream is made with simple, whole food ingredients and no refined sugar, making it a healthier option for an occasional, indulgent treat.
Health Benefits
Intolerance-friendly. Since this Whipped Topping is made with cashew cream instead of dairy, it's perfect for those who are sensitive, intolerant, or allergic to dairy. It's also great for those with alpha-gal syndrome.
Beneficial fats. Made with a simple blend of cashew cream and coconut oil, this Whipped Cream is a source of healthy fats.
No refined sugars. Sweetened with pure maple syrup, this Whipped Cream is free of heavily refined sugars.
Mineral-rich. Cashews are a great source of minerals, including potassium, magnesium, copper, iron and zinc.
How to Make Dairy-Free Maple Vanilla Cashew Whipped Cream
As mentioned above, this Dairy-Free Maple Vanilla Cashew Whipped Cream is fuss-free and easy to make. All you need is four simple ingredients and about ten minutes of time. Follow the steps below or watch the video.
What You Will Need
Equipment
- Hand mixer or stand mixer to create a fluffy, whipped texture.
- Mixing bowl to combine and whip the ingredients. If using a stand mixer, use the bowl that comes with it. If using a hand mixer, make sure the bowl you use is tall enough to catch any splatters while mixing.
- Measuring spoons and cups for accuracy.
- Spatula to scrape down the sides of the bowl.
Ingredients
- Cashew cream creates the creamy base of this dairy-free whipped cream without dairy.
- Unrefined coconut oil adds a fluffier texture than just plain cashew cream.
- Pure maple syrup adds natural sweetness and a delicious, rich flavour with notes of caramel.
- Vanilla bean paste (I used Java Sisters Vanilla) adds a bold vanilla flavour.
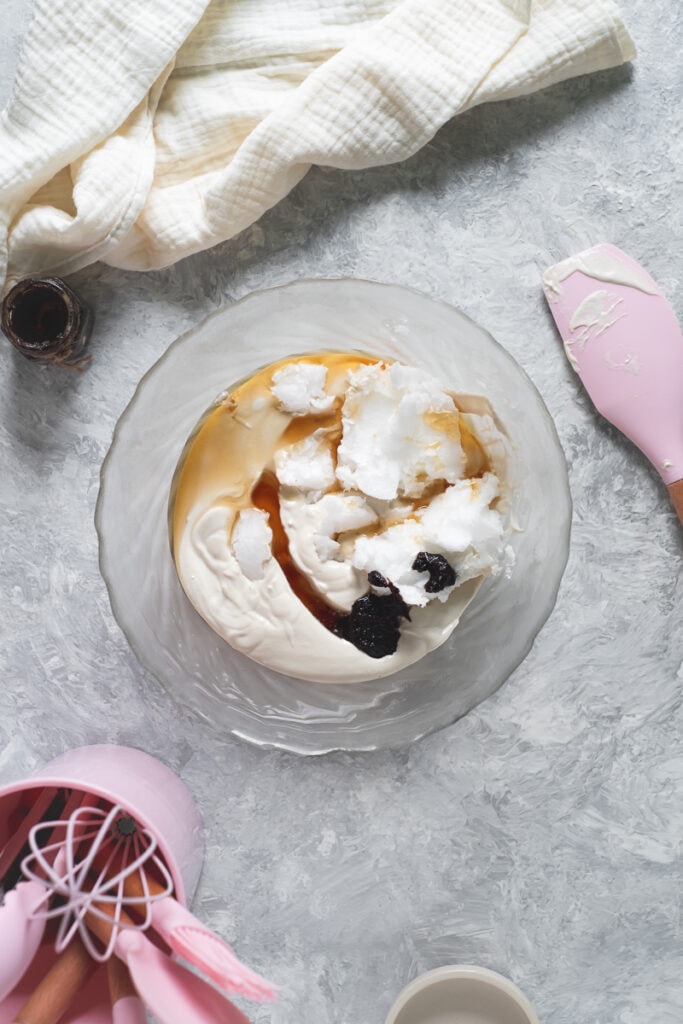
Step 1: Combine Ingredients
To start, you will need a batch of homemade unsweetened cashew cream. Follow this step-by-step guide to make it.
Next, add the cashew cream and unrefined coconut oil to a mixing bowl. You want the coconut oil to be in its solid state. So, be sure to use pure cold-pressed coconut oil at room temperature. Melted or fractionated coconut oil will not result in the same fluffy texture.
If your coconut oil has melted due to warm temperatures, just stick it in the fridge for 20 - 30 minutes to solidify.
Then, add the pure maple syrup and vanilla bean paste.
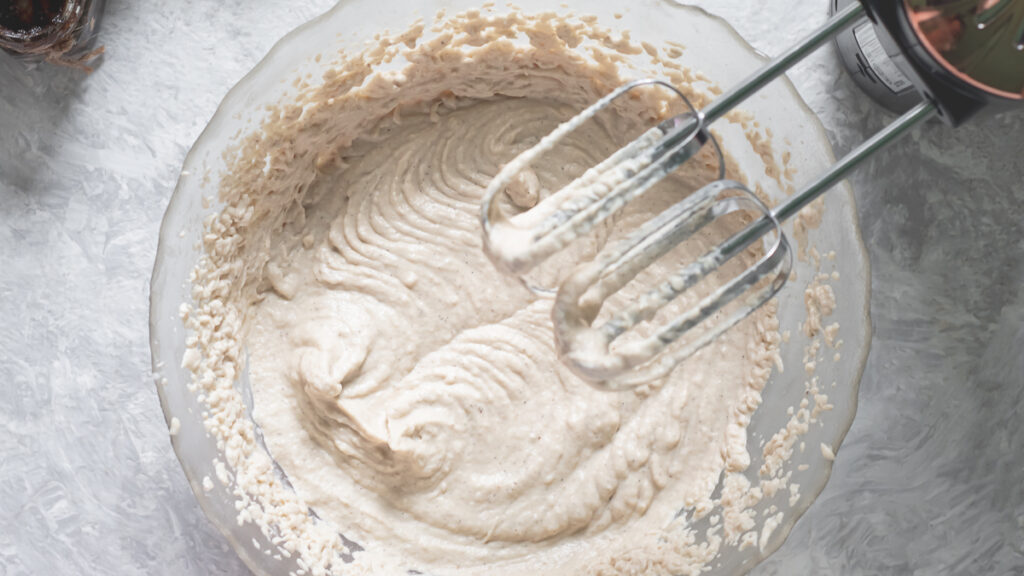
Step 2: Whip
Once all the ingredients have been added to a mixing bowl, use a mixer to whip them together. You can use flat beater attachments or a wire whip. However, I find it easier to use flat beater attachments if using a hand mixer.
To avoid a big splatter, make sure the mixer attachments are fully submerged in the mixture before turning it on.
I find it best to start off on the lowest setting, slowly increasing the speed. Depending on how powerful your mixer is, you will want to increase the speed to a medium to high setting. With most mixers, a medium setting is best.
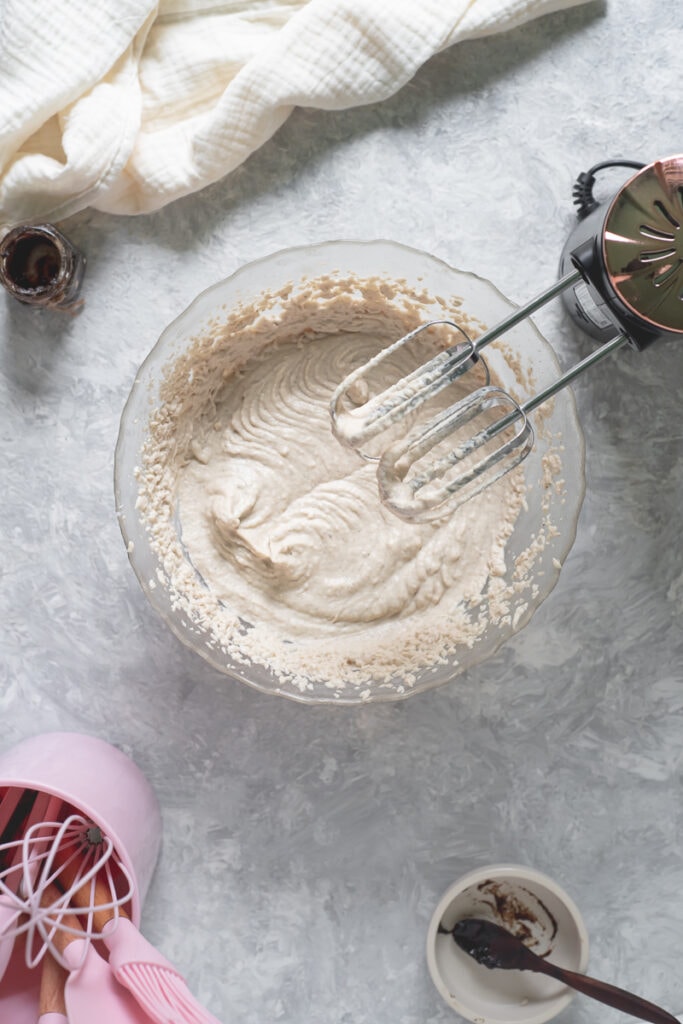
Continue to whip for a minute or two, or until all the ingredients are well combined and the mixture takes on a lighter, fluffier texture.
I should note that this Whipped Cream is a little thicker than traditional versions and what you get in aerosol cans. However, its thickness makes it great for using as a frosting!
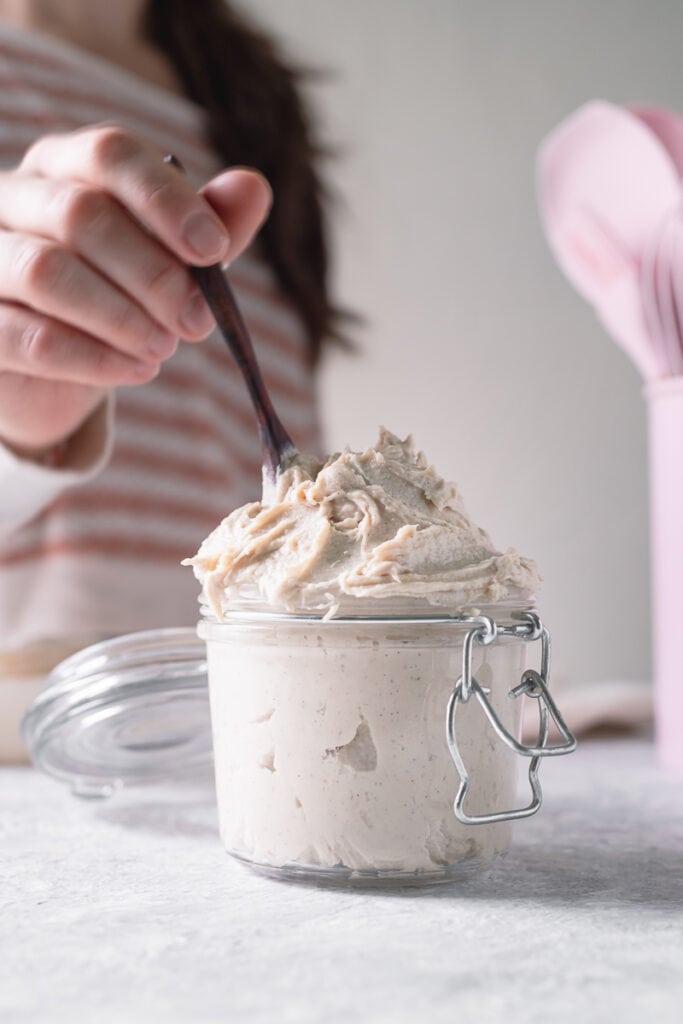
If you find your Whipped Cream loses some airiness after refrigerating, you can always give it another whip to fluff it up right before serving.
The beauty of this Dairy-Free Whipped Cream is that you can't overwhip it!
My Top Tips
- Whip right before serving for the fluffiest texture. As mentioned above, you can re-whip this fuss-free Whipped Cream after refrigerating.
- Make the cashew cream in advance to reduce the amount of preparation time, and whip this recipe up in a cinch!
- Use solidified, unrefined coconut oil. Melted or fractionated coconut oil will not result in the same fluffy texture.
Substitutions & Variations
Pure vanilla extract or vanilla powder can be used instead of vanilla paste.
Raw honey can be used instead of pure maple syrup for another natural sweetener option.
Make it oil-free by omitting the coconut oil. Just note that it will remain more of a creamy, pudding-like texture.
Storing & Saving
If you don't use your Cashew Whipped Cream right away, it can last up to 7 days in the fridge. Re-whip it right before serving to fluff it back up after refrigerating.
You can also store it in the freezer for up to three months! The texture may change after thawing from frozen, and it will need to be re-whipped. For best results, let it thaw in the fridge overnight and re-whip right before serving.
Recipe Highlights
No fuss. Unlike some other dairy-free Whipped Creams, this recipe is no-fail, fuss-free, and so easy to make.
Dairy-free and vegan-friendly. Made with whole food ingredients that are naturally dairy-free, this Homemade Cashew Whipped Cream is suitable for those with dairy allergies, intolerances or sensitivities as well as those on a vegan diet.
No refined sugars. Sweetened with pure maple syrup, this Whipped Cream is free of heavily refined sugar.
More Dairy-Free Sweets
Maple Vanilla Cashew Whipped Cream (No Dairy)
Print RecipeEquipment
- Mixer (Hand or Stand)
- Mixing Bowl
- Measuring Cups
- Measuring Spoons
Ingredients
- 2 cups Cashew Cream
- 1 cup Unrefined Coconut Oil
- 3 tablespoon Pure Maple Syrup
- 2 teaspoon Vanilla Bean Paste (I used Java Sisters Vanilla)
Instructions
- To start, you will need a batch of homemade unsweetened cashew cream. Follow this step-by-step guide to make it.Next, add the cashew cream and unrefined coconut oil to a mixing bowl. You want the coconut oil to be in its solid state. So, be sure to use pure cold-pressed coconut oil at room temperature. Melted or fractionated coconut oil will not result in the same fluffy texture.If your coconut oil has melted due to warm temperatures, just stick it in the fridge for 20 - 30 minutes to solidify.Then, add the pure maple syrup and vanilla bean paste.
- Once all the ingredients have been added to a mixing bowl, use a mixer to whip them together. You can use flat beater attachments or a wire whip. However, I find it easier to use flat beater attachments if using a hand mixer.To avoid a big splatter, make sure the mixer attachments are fully submerged in the mixture before turning it on.I find it best to start off on the lowest setting, slowly increasing the speed. Depending on how powerful your mixer is, you will want to increase the speed to a medium to high setting. With most mixers, a medium setting is best.Continue to whip for a minute or two, or until all the ingredients are well combined and the mixture takes on a lighter, fluffier texture. I should note that this Whipped Cream is a little thicker than traditional versions and what you get in aerosol cans. However, its thickness makes it great for using as a frosting!If you find your Whipped Cream loses some airiness after refrigerating, you can always give it another whip to fluff it up right before serving. The beauty of this Dairy-Free Whipped Cream is that you can't overwhip it!
Notes
Watch the Video!
Nutrition
This post contains affiliate links. As an Amazon Associate and affiliate to other trusted brands, I earn a small commission for purchases made through the links. I only recommend products and brands that I trust and use myself. All opinions and information provided have come from my own experience and research. Please read my full disclosure, disclaimers and privacy policy for more information.
Rate this Recipe & Share How it Turned Out!